Lyndhurst Garden House

Lyndhurst Garden House

Saturday, January 24, 2015

The Bathroom Vanity

I am still not planning to replace the master bath vanity any time soon.  And now that I have tile trim moulding entirely around the bathroom floor, including the toilet side of the vanity, the vanity is pretty much grouted in place.  (The tile trim is fabulous btw.)  The new bathroom is very very nice in what has been re-done.  The vanity, finally painted after looking rotten for 22 years, is at least finally acceptable in civilization.

One thought that came to mind, however, is vanity topped with the same Calacatta Porcelain tile as in the shower, with a bowl sink.

One set of ideas I like a lot is that the sink should be higher (I can barely reach down to existing sink, surprisingly enough since the vanity appears low) and less prone to splashing.

Another way to get to less splashing would be a wider sink.  I find the 7th bathroom photo in this blog to look especially nice, with extremely wide porcelain sink that also fills up the front-to-back depth.  (Most of the other bathrooms look kitchy, with less in the way of practical ideas.)

So then the sink should be not a round bowl, but a large square sink, nearly as large as a kitchen double sink, filling up the entire depth, as much as possible, and raised, with faucet at chest height.

Thursday, January 8, 2015

Weather Stations: Real and Gadget

netatmo looks cool, and might be worth getting, but it's really a gadget.  It has interesting indoor and outdoor air quality features which are interesting (but once again, not Real air quality features, just surrogates like CO2).  Just to get indoor/outdoor temperature and humidity on a tiny screen, you'd be paying about half that much anyway, and this is cooler, so may be worth getting anyway.

The cheapest Real Weather Station may be the Davis Vantage Vue.  I may save my coin for this.  It looks better made, has way more features.  I won't sweat giving up the indoor CO2 sensor too much.  Made in USA and the outdoor unit is solar powered.

The next model up Davis has more optional features, such as solar level tracking.


Tuesday, January 6, 2015

Armstrong Alvina is Grippy like it looks


I have the Armstrong Alvina Buff flooring installed now, and it is everything hoped for.  It is beautiful and my friend likes it.  The color blends with both Kohler Almond and the Calacatta Porcelain tile.  It works with other colors like my wall paint and black also.  And, as I hoped, it has a grippy texture.  It is noticeably more grippy than any of my existing vinyl flooring.  Not just in the faux grout lines, which do have a helpful slight depression as expected, but everywhere.  It has a grippy look and a grippy texture, and in no way seems like a cheap product, despite not being in the most premium line (which didn't seem to have anything like it).

The floor guys quickly agreed to caulk the bathtub seam using the GE Silicone II Almond Door, Window, Basement I had purchased, which has the required mold protection as well as being 100% silicone.

I know this is not the recommended Tub and Tile caulk, but it similarly has mold and mildew protection, it says so in bold print on the label.  Given that they both have mold and mildew additives, what is the difference?  Does the Tub and Tile have more mold protection?  It is unclear, but the Tub and Tile does have a specified mold warranty.  Perhaps the warranty is the only difference.  It would seem that they couldn't say mold protection if it wasn't fairly universally effective…some outdoor climes are worse than bathtub.  Perhaps tub and tile is softer so it can work with hard tile?  Not a problem in my case since I have vinyl flooring, not really tile.  So perhaps for me Door & Window is the preferred choice because I'm not really sealing porcelain to tile.  Anyway, I don't think it should make much difference so long as I have the floor cleaned regularly and keep the caulk intact.  I erred in not buying the exact recommended choice, but it hasn't seemed worth making another trip to Lowes to get the other kind instead when in this case there is little explicit difference.  I've read some guys say they use "all purpose" for everything, even the bathtub seam.

It didn't look like a perfect caulking job either.  Perhaps that's why the store recommended the tub strip.  The flooring guy said right off it could use a second covering of caulk.  I'm not sure if that's the right thing to do, usually caulk removal is recommended more than adding to caulk.  I had purchased some tiny backing rod (which might have been to large anyway) but never got around to offering that…the flooring job was done so fast.  Tom re-did the caulking.  I'm not sure about perfect anymore, but I think it's good enough now.  It might have been better done with backing rod as I had purchased but never got around to advising the floor guys about.

Technically, I bought Armstrong Lacerta Carrera, which the store (a top tier Armstrong dealer) said was identical but gave me a Lacerta Gold Warranty.  As far as I can tell, it is the identical Armstrong product, listed on Armstrong website, with the identical 15 year warranty, but part of the Lacerta collection sold by certain stores.  The stores possibly get a cut on the advertising and warranty when they sell Lacerta (which they have samples for) and the warranty (which they are expected to provide).  Though listed on Armstrong website, if you start from the top of the Armstrong website you'll see the Alvina Buff instead of the Lacerta Carerra.  I actually did my searching and deciding on the website, though I did ultimately visit the store to see a sample.  They wanted me to see a sample, I said I couldn't make it that day, but ended up going to the store anyway and they had sent the Carrera sample to another store so the saleslady could snap a smartphone picture for me.  But at least I was able to verify the texture.

The randomness of the Alvina fits the Callacatta Porcelain tiles also, in a curious kind of almost photographic negative way, though nothing comes close to the Calacatta tiles in inspiring endless and effortless hallucination.  What objects can you see pictured amidst the dark colored veins that change slightly from different angles and in different lights?

No photograph I've been able to make with my smart phone fully captures the way it actually looks.  The photo on top is with the halogen ceiling light (used to be "heat light") running, which gives nice colors except the main beam is in front of the tile and causes the flooring to wash out a bit in the photo and look whiter than it is toward the bottom of the photo.  That was also w/o flash.  Here's are two with and without flash, using only the vanity light (now with two bulbs).  The vanity light gives the bathroom a very warm hue, but not quite as overwarm as the picture looks.


Tile, tub, and floor colors work in any light, and probably even better than shown, if still arguably not perfect.  But the floor works as well with both tub and tile as anything I can imagine, since those were already pushing the threshold of matching (but still do, I think).

It's beautiful and comfortable.  Two days after installation I'm beginning to see it as more "premium" than I did originally too.  It doesn't look or seem cheap in any way.  It has comfortable padding but not so much you worry about it.  (Less give than the Luxe Plank Best with Quiet Comfort underlayment I have in the King's Room itself, but the give is more localized around the contours of your foot.  You can barely feel the padding, but it adds to the comfort.  The texturing is more than any other floor I can remember, secure but not rough on feet.


Covering the Holes instead of Filling them

New Tub and Calacatta Porcelain Tile
I am very happy with the new tile and tub in my master bedroom.  It's beautiful!  Everyone who sees it is blown away by the fantastic beauty of the Rex I Bianchi Calacatta Porcelain tiles filling the entire shower enclosure area including the furring inward.  Those tiles must be experienced, with their wonderful endlessly complex patterns and varying color depending on light and angle.  Close up the lines do not appear black at all but grey and/or gold.  I think the Kohler 32" wide Bellwether tub in Almond is fantastic looking also.  I still believe Kohler's Almond 47 is the prettiest color even if it might not match the tile as well as ugly Kohler biscuit (I have never done the comparison actually) but Almond matches close enough and even helps bring out the gold in the tile up close.  With contoured front and back, the 32" Bellwether is a mini Tea for Two and has comfort as well as ultra modern looks.  The valve trim is not yet done.  The tile setting and grouting is done very well if not to museum perfection, well enough to let the tile on the back, especially, speak for itself.  The niche in the left side is wonderful and convenient but the cuts required were not laser perfect and there was even a tiny bit of edge chipping on the detailed cut pieces, and fraction of a millimeter misalignment.  I'm being picky here to give you the full picture.  But the back is mostly made of full pieces which look perfect, and the right side looks perfect also.  The tile reaches and is sealed to the ceiling, as is the backer board (by request).  I would consider this A class work, if not A+ (and the general helpfulness of the tilers would entitle them to an A+ for overall service anyway, in my grade inflated evaluation, despite details described below which are typical of almost all contractors).  The Tile is A+++++, the best.

It's hard to get a full height picture with my cell phone because of limited wide angle, so the above was the best I did before the new flooring installation, intended to show as much height as possible since the new tile goes all the way to the ceiling.

My initial impressions are also that the bathroom is less cold than before.  It has an engineered vent to my HVAC system (by the book) and no exterior windows.  So you'd think it would be as warm (when cold out) as any other interior room.  Yet, before the new tile it could sometimes be a bit on the chilly side, mostly probably due to air leaks in the broken tile wall and up by the ceiling.  Now there are no visible leaks, and the tile seals all the way to the ceiling.  The final tiling job was done much better than I was thinking while it was being done (there may be some inconsistencies in the tiny grout lines…but I am seeing far worse in commercial work elsewhere now that I've started looking at grout), including the sealing to the ceiling.  Previously there were big holes near the ceiling where the original track home builder covered a generous ceiling gap with lightly mudded paper which was tearing to shreds over the years.  And sealing is more and more understood as the most important part of insulation.  The photo before demolition below unfortunately doesn't show the ceiling paper cracks I'm describing

Original Tub and Tile Just Before Demolition
But I know it's not perfect underneath.  After the tile demolition I sealed, mostly, an uninsulated exterior panel behind the plumbing void that runs down the center of the house and also opens up into the under-tub area.  I think that might have helped a lot.  That one missing piece near the access panel through the refrigerator bay has a long story behind it…I removed the original piece 20 years ago when we bought this house as abandoned and I was clearing out an in-house ant mound behind the refrigerator bay, or what seemed to be an ant mound, and I started pulling on something awful looking, which turned out to be a piece of insulation.  I pulled out the entire piece and intended to fix it, but forgot after a few months.).


Corner behind and under old tub had missing insulation
(upper middle of photo)
Insulation fixed by me, with bottom and side pieces to completely fill gap
(however, space behind beam above is not filled, I hadn't counted on that space)


But I had been hoping to get most of the old ratty looking fiberglass above the tub replaced.  I had held back on making any requests in this regards, figuring it was too late to get someone who would do it right (my builder Tom).  After the demolition, the rightmost panel of fiberglass had rotten looking paper, but most fiberglass backing was intact, and the exterior was fully stuffed.  I figured the rotted looking paper was largely a superficial problem of little consequence to insulation quality:


But then after the tub had been installed, the paper had gotten quite torn all around, especially where it had been rotten looking before:

Right side, after new tub installed

Left side, after tub installation

Then, the day before the tile installation began,  I asked the tile company about it, and they said they would replace the bad insulation.  I offered to let them use my barely-used roll.

I told the installers about this, and they agreed.  I said at least the first two rows, maybe everything.  I saw the first (and most torn) piece of old fiberglass going down the hallway.  Than another.  Maybe more, I closed the door after that point.  But I didn't actually watch the work being done, until much later when the door was open I peered in.  And what I saw was that only two of the stud bays showed new fiberglass, and one of them showed a gap varying from 1-2 inches at the top.  The old fiberglass had been installed with no gaps.  Now there was at least an unacceptably large gap at the top of the farthest right row. Only the portion above the cross piece was visible on the next row, so I don't know if fiberglass had been repaired there.  When I later rolled up the fiberglass, it seemed they hard hardly used any.  They couldn't have replaced more than the first two stud bays of insulation, and possibly only one.

I don' know how much fiberglass was replaced, but seeing how they left gaps where they did replace it, perhaps it's fine that they didn't replace much.  That's what I thought when I saw the gap.  By that time the backing board had almost been completely installed, with only the last few inches visible above.  (BTW, the backing installation looked as superb as I could imagine, though I am no inspector.)  It was too late to change any insulation covered up, and it would be a big hassle even to fill the gap up top.  I felt better to leave the guys alone to doing a very nice tile installation.  I could hardly ask for perfection on this re-insulation as it was an "extra" and these guys were tile specialists, not insulation specialists.  Though it does bug me that nowadays all builders should be insulation specialists, and hole fillers, given the increasing importance of energy efficiency.

I think an optimal remodel would have replaced all the old fiberglass, and done so at code level or better.  And of course all holes filled.

As far as holes generally not getting filled…I could write a book on that by now.  Even with the best builder I now know, Tom, working himself, when I ask for it, I can get serious crack filling done.  But if it's too weird, such as grade level behind the baseboard, he won't take much time on it, and I may well (I did in the King's room) reseal it again myself.  With Rob, it seemed impossible to get him to even seal behind the baseboards.  Sealing behind the baseboards is contrary to the first rule of contract building: quickly cover it up.  And the second rule is: what's covered up and can't be seen doesn't matter.

Now I did that evening observe some gap between the otherwise perfect backing board and the ceiling.


I asked for that gap to be filled with mud, as contractor Tom had done in the King's Room.  The tile guys easily obliged, and the result was almost but not quite sealing perfection.  I decided not to rag them further..perhaps that small hole in the back left corner would be useful for tile or grout installation or whatever, and would cause a problem if they tried to fill it completely.  Probably not, but I don't like to be too pushy, so my artists can concentrate on their craft as they know it, and not get distracted by me when it's only super trivial.  The rest of the sealing is wonderful--and I bet it's not usually done, but I got it because I asked for it.


Still, things like sealing fan boxes to the sheetrock, I just know I have to do myself, and have done so, for three new fans since 2012, and many outlet boxes also.

I've now tested the inside of the tiled area with an IR thermometer.  Surprisingly there is little particular variation over where I saw the slight gap on top.  In general, the first stud bay area is about a degree or so warmer than might be expected in the middle, then only average at the very top.  So perhaps the new fiberglass in that area helped, but the gap in fiberglass didn't.  Best would have been new fiberglass everywhere.

The tile exterior wall is nonetheless colder than it should be everywhere, in the range of 59-65 when the interior wall is at 71 degrees (and it's freezing outside).

I think the problem now mainly is most likely exterior gaps.  Cold air is getting into the stub bays.  If cold air leaks in, the insulation doesn't help much anyway.  I need to study the outside with IR, which I rarely remember to do, or don't feel like doing.  Or even get professional examination. I've seen $99 IR cameras for smartphones too, and that looks interesting.

Anyway, there are bigger holes.  Such as the fireplace, it seems, is one of the coldest places inside the house, I've determined.  The flu has been snugly shut since forever, but the metal piece itself most likely is uninsulated and draws cold into the house.  I need at least a fireplace door, or maybe seal the whole thing up.  But I'l also worried about the acoustics.  Anyway that's a big unsolved hole.  As is the garage conversion suspended ceiling, but that ideally requires a complete rebuild with walls extended to the true garage ceiling--then get that insulated.  Strangely the hall bath is another cold place, and yet it's an all interior room with no exterior walls.  It does seem that a cold spot is the ceiling exhaust fan, but also the side wall which faces the plumbing void.

But the mainstream of builders seems to be well away from accepting what I might call the theory of no holes.  No holes is better than some, and the fewer the better.  Holes at any layer are bad, even when easy to cover up.  Each layer of construction should be continuous from end to end.  It doesn't take very much thought to understand this.  Any hole is a thermal bridge and possibly also a leak.


Wednesday, December 24, 2014

Grippy, but not too distresssed

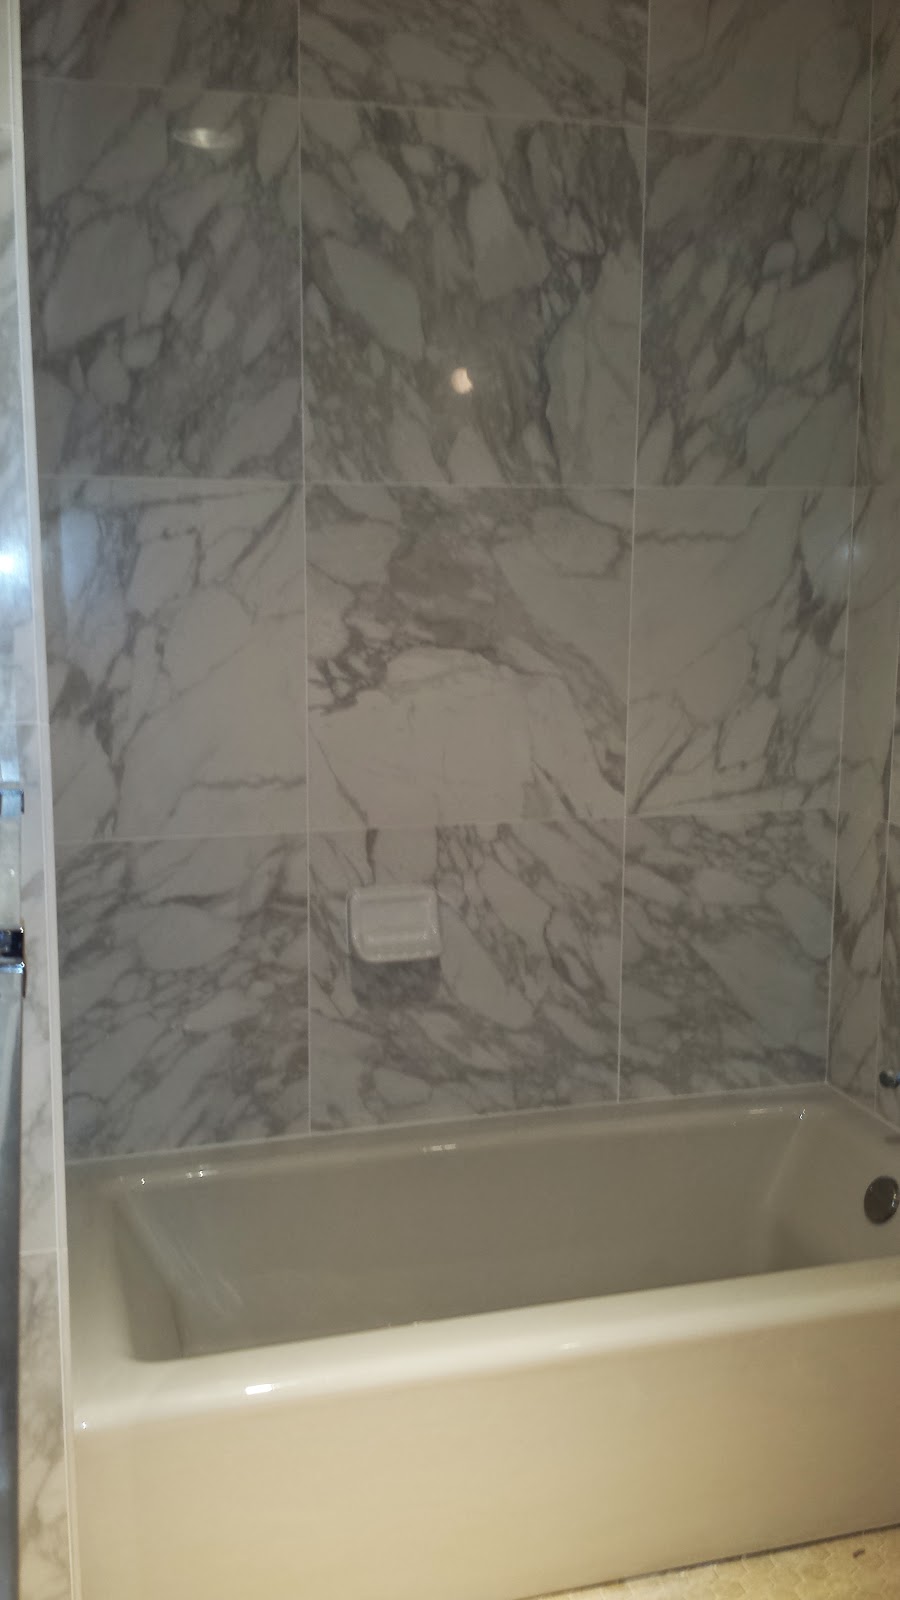
I've ordered Armstrong Alvina Buff sheet flooring for the King's bath.  This is nice looking, not too distressed looking (not distressed at all actually--it could be brand new stone decking around a built-in hot tub, but made of slightly weathered stones), and yet looks (and actually feels) quite grippy.  It has variable texturing everywhere and the grout lines are noticeable and fairly dense.  At the same time, it's vinyl not stone, so is actually fairly smooth (despite the slight bumpiness on the order of a millimeter or two), and doesn't have hard edges you might hurt your feet on (if it were real stone decking).  It' has a nice amount of give to it for cushioning by design.  Padded smooth flooring with very slight and variable bumpy texturing for grippiness is perfect for a bathroom, I think.  And the colors go well with my Calacatta Porcelain shower, my Kohler Almond bath and toilet, my golden beige wall paint (same as in King's room) and black (for vanity and such).

I just don't get why people like tile floors.  They are cold, hard, and slippery usually.  The only reasonable way to do a bathroom tile floor is with very small tiles and a high proportion of grout lines.  Then you get at least some friction when wet.  But they're still cold and hard.  Hard floors are hard on feet, ankles, and ligaments--giving you heel spurs and the like.  I like to walk around the house in bare feet, and so I love padded flooring.  The master bathroom is the most important place for bare feet after the master bedroom, since even if I were to wear shoes elsewhere in the house, I'd still be barefoot mostly within the master suite while I'm getting bathed, dressed, or undressed.  Now it's true that within the shower itself it's a good idea to wear flip flops.  I do that mostly these days.  However there is always a time when one is putting on or off the flip flops when the floor could still be wet.  Preventing slipping is a very valuable floor feature.

I think people like tile because they believe it's easier to clean.  Or that it's permanent.  The permanence part may be true, though eventually everything will be replaced or refurbished (the tile in a vintage house might be saved but re-grouted after 100 years).   But nowadays other floors can last sufficient long that it barely matters anymore.  WRT cleaning, why is that so important?  Any good floor can be pretty easily cleaned, as long as you don't wait a few years to let the dirt bake in.  A monthly housekeeper can keep all the floors from getting baked in dirt, and I've gotten used to having a monthly housekeeper for that and other reasons--I wouldn't want to go back to not having one.

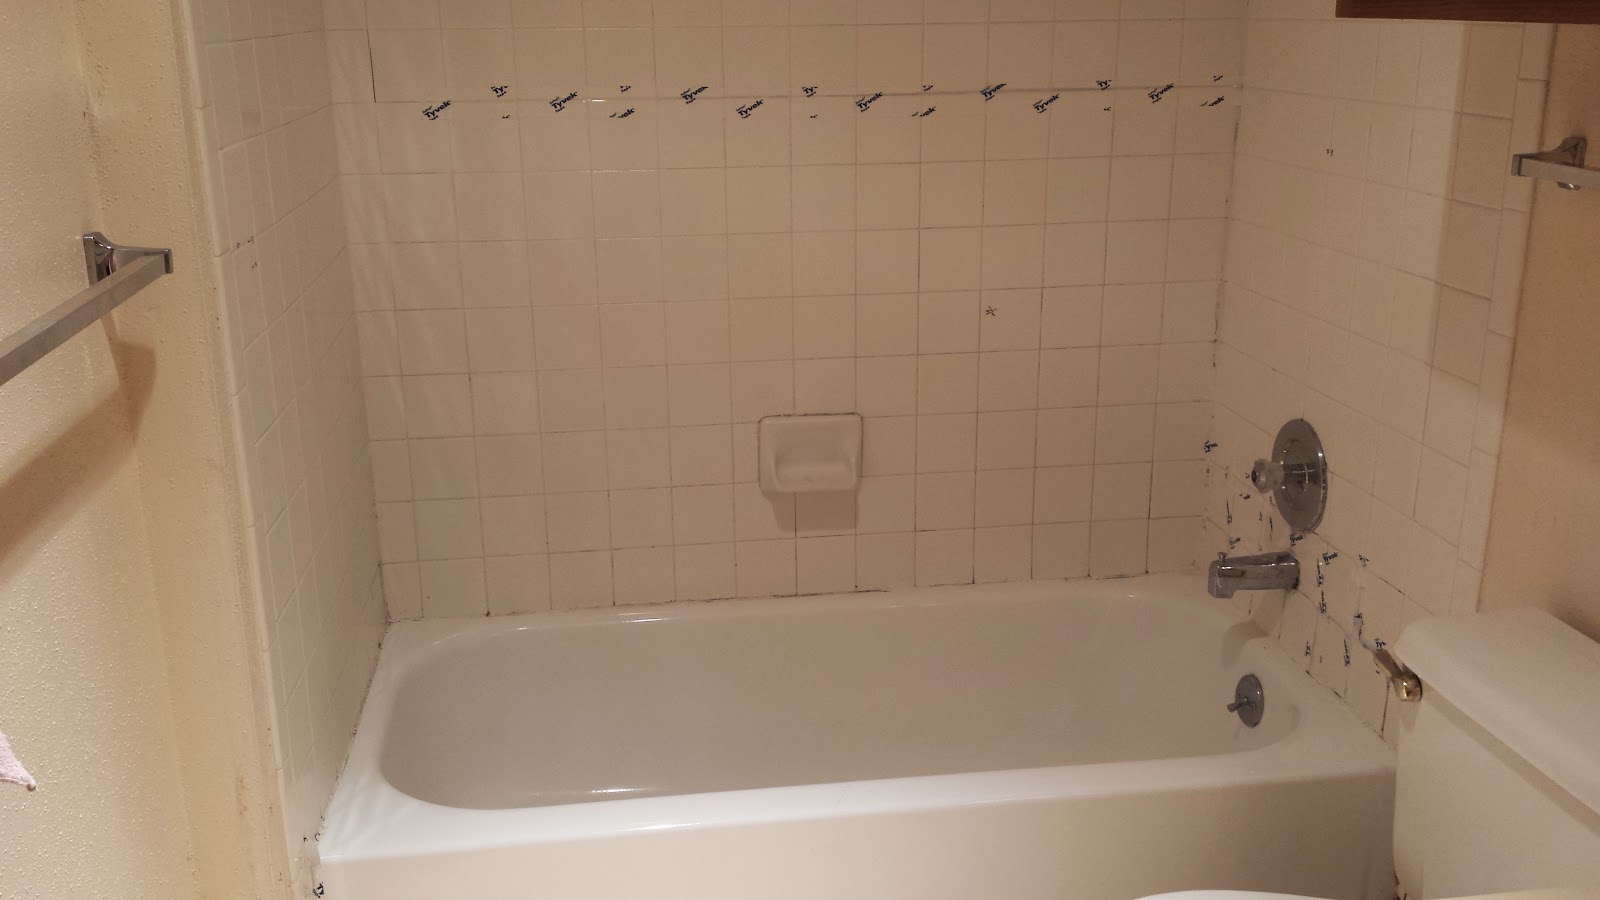
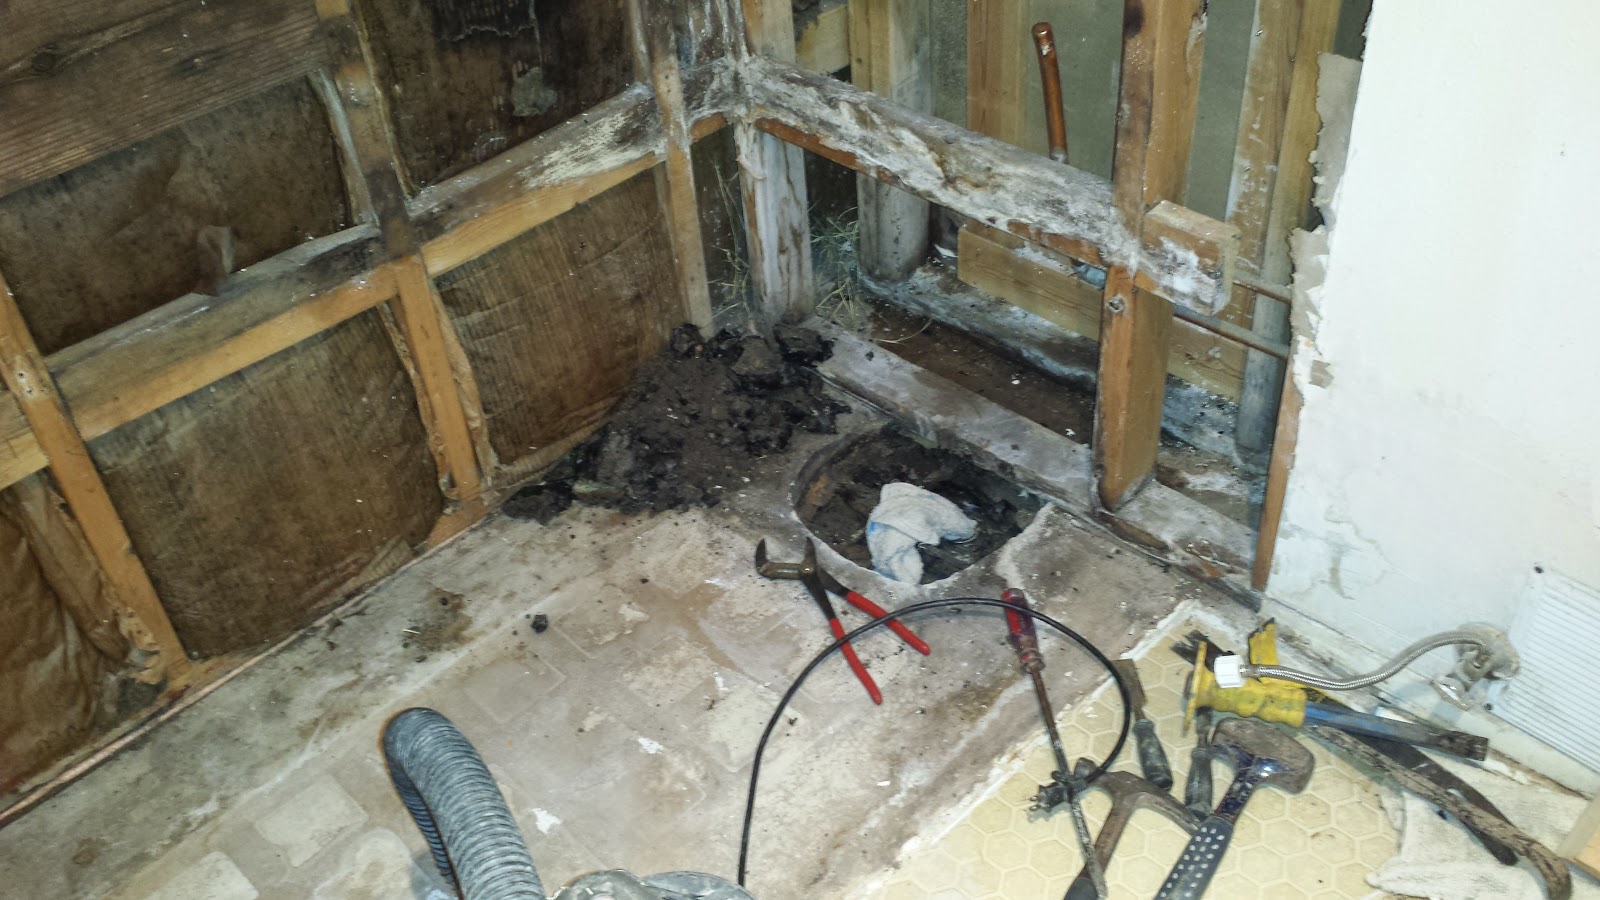
A quality vinyl floor can last 30 years or more.  My original bathroom floor probably had a 5 year warranty and is still OK after 31 years.  I'm only replacing it because it got torn during the new bathtub installation, and since a new toilet has yet to be installed, it's the perfect time to install a new floor.

With a tile floor, over the course of 30 years you might be looking at several "grout sealing" operations would would add up to the cost of a new vinyl floor, let alone the fact that the tile floor was a couple of times more expensive in the first place.  A new bathroom vinyl floor isn't actually very expensive.  And then you get the fun of choosing something entirely different in 15-30 years.  Or not.

I am only disappointed the Alvina Buff has the 15 year warranty instead of the 20, 25, or lifetime warranty.  But none of the longer warranty vinyls have as grippy looking a pattern.  Instead they often look like smooth large format tiles with deep distressing.  The grout lines are too far apart to be of much assistance and it's hard to tell from photos how much grippiness the deep distressing provides.  But they don't look as grippy, and I'm guessing and believing he look is accurate as the cause makes sense.  The higher warranty floors have thicker but also smoother wear layer.  A thicker layer can't make as much curvature, so less dense texturing is possible, and likely the grippiness is less too.  A layered flooring product has to bend the entire wear layer; you can't add layers on top for texturing because those might peel off.  The whole surface has to bend, and the thicker it is, the harder it is to bend or make bent.

The Alvina flooring has 10mm wear layer, as does the other most highly textured pattern Bleeker Street, Armstrong has two higher grades up to 20mm (the 20mm being very new to Armstrong), but those all look less textured, and the top line Congloleum I was interested in, but dismissed because it didn't look grippy, has a 20mm wear layer.

There was only one other pattern in the Armstrong catalog that looked possibly even more grippy is one with small squares, perhaps about 1 inch.  One example of this pattern is the Montauk which has an appropriate color G3A93.  Another example is Bleeker Street Uptown.  The density of the grout lines suggests this would be most grippy, maybe even more grippy than the Alvina.  But I don't find these patterns attractive.  When you zoom in on them, they are very distressed looking, as if they were snapshots of real sidewalks in some US city.  Not only is there mottling, there is some whitish stuff that looks a bit like baked on bird turds.

In principle vinyl flooring can be made to look like anything, pristine or distressed.  Why are almost all the patterns now distressed, and often horribly distressed like Montauk and Bleeker Street?

It was also hard to tell from the photos, but it looked a lot like the grout lines on these faux-street vinyls are raised instead of depressed.  That would have a tendency to trap water, possibly not good.  I can't tell from the pictures if that is actually true, and even if it is true, the raised grout lines would still have added traction, perhaps a lot of added traction.  But it was really the awful close up look that made me decide against them.  And they have the same 15 year warranty as the Alvina Buff that I'm getting.  Also the same floor technology, Fiberglass Masterworks Technology 3D with VTx.  That makes for a floor with good texturing, and therefore presumably good grip.  I think the fiberglass should be long lasting also, meaning the texturing will stay like new for a long time.  My old flooring had decent texturing originally but has gotten nearly flat.

I was unable to find any discussion online about the grippiness of vinyl floors.  AFAIK vinyl flooring has inherently more grip than typical ceramic or porcelain tile.  But it would still be nice to have numbers.  Ceramic and porcelain tile have a Wet Coefficient of Friction (wCOF) specification which is useful for comparison.  But an actual tile floor made out of such tiles would have a different effective grip depending on the spacing and thickness of grout lines.  The grout can be a much more important factor than the tile itself, and yet nowhere do you get an "overall" rating of a particular tile/tile-size/grout with regards to grip.  Even a coefficient of friction alone is not a sufficient way of describing an actual floor, because the wCOF varies according to position, and not all patterns of such wCOF variation are equally useful in preventing slip, which is a complex and dynamic process.  My own sense is that although vinyl floors don't have the highly varying COF and level of real tile floors, vinyl texturing is more important than you might think if your thinking is based on static calculations.  As one is gaining traction, the smallest textured point can be taken advantage of with transient downward force.  On my old vinyl floors, I think they would be useless without their fairly dense texturing.

Really you need something more like real world testing, though I'm not suggesting inducing actual slips.  Some kind of synthetic test…or just subjective feel objectively recorded, might be the best we can do.  I was thinking about measuring the distance of slip with a footlike object after the floor is evenly sprinkled with a coating of water.  Not just one measurement, but an very large number in random locations and directions.  From which an "average slip" would be computed.  But a complicating factor is that it would vary according to weight a lot.  So one would have to do the test with a range of different weights also.  And then not just "slip direction" but also a random "direction of force".  And then variation of force.  Ultimately you might need to do a gazillion measurements.

The random pattern of Armstrong Alvina (with random relatively dense grout lines and varying stone look textures) flooring suggests to me it would do well with a hypothetical random slip test.  Other tiles which simulate large format stone tiles--a very popular theme in the most expensive vinyl flooring--might not do so well, because in anything like a linear direction you slip a long way to the first grout line.

Deciding on the Alvina pattern was difficult, because I had to defend it in my own mind against a more classical bathroom flooring pattern, or at least what is seen a lot now, using large format stone or porcelain tile pattern.  It was also easier to find those faux large stone patterns in compatible colors.  My favorite among the large stone patterns (and actually my favorite looking tile of all) is Congoleum's Berlin Oyster Bar.  They show it in a bathroom scene which looks elegant and totally gorgeous.  It has a lifetime warranty, a thick wear layer with aluminum oxide, and silver for microbial action.  This is a top line vinyl (the Armstrong Alvina is only midline), it looks great, it works with my colors obviously (it was not so obvious with the Alvina Buff, I had hopes, but all the same it wasn't clear if it had too much orange or not…now I believe after studying many pictures and print outs right next to the tile that it does not).

But THE thing which killed the Berlin Oyster Bar was my concern about how grippy it is.  For starters,  an actual stone tile floor like that would not be very grippy at all, or certainly not when new anyway.  It has the highly distressed look (which in this case I find OK because of the cool and random coloration) which suggests some added grip over a brand new stone floor.  But maybe not much.  And the grout lines are of no help at all being so widely spaced.

Too bad, I suppose, that I didn't have time to test a sample of the Congoleum.  But I felt that even if the distressed stone has a texture like sandpaper, when wet it wouldn't help much.  Though possibly, in actual use, the Congoleum would do fine because of the cushioning.  This is in their Air Step Vibe series which should have impressive cushioning (though I don't really know how it compares with the various Armstrong vinyls).  That cushioning adds grip, but it's hard to know how much without testing.

There were many other top line stone look vinyls made by Armstrong and Congoleum that might have worked.  Distressed stone look is the most popular pattern in the most expensive vinyls, and the lightest color of every pattern had a chance of working with my Calacatta shower tile.  Among all I saw (and I tried to look at the full catalogs) the Berlin Oyster Bar had the best look and coloration.  But I worried that none of them would have sufficient grip.

I'd buy the vinyl with a longer warranty if I could mainly because it would likely wear better over time.  Actually collecting on a vinyl flooring warranty is another matter, probably not worth losing any sleep due to being stuck with shorter warranty.  Usually most vinyl floors are replaced not because of "ordinary wear" (as would be covered but likely pro-rated in most warranties) but because of an adverse rip or tear (as just happened during the bathtub installation) which would not be covered anyway.

Now it's not surprising that a random grippier pattern might not wear as well anyway.  But it also appears that because of being a midline tile, the Armstrong Alvina Buff has a thinner wear layer.  Now it's also possible that a thicker wear layer might be too difficult or costly with the grippier pattern.  In examining both Armstrong and Congoleum catalogs, I found no exceptions, in all cases the vinyls with the grippiest patterns were not available in the longest warranties, and the patterns with the longest warranties were either large format stone or wood, neither of which looked very grippy.

It was very hard to tell this from on screen photos, which are hard to compare.  But printing out both the Berlin Oyster Bar and the Alvina Buff showed them both to have compatible colors with my bathroom, with the Alvina being just a bit less good for the Calacatta but better on everything else, and also favoring the general golden tone (the Oyster Bar coloration has some useless-to-me blue in it and only weakly accepts black and gold tones).  So actually, from what I've seen in prints, I like the Alvina Buff coloration better, a little, in my bathroom.  But I do worry that the actual flooring may have more orange.  It already pushes the limit a bit on that (Orange and Calacatta don't go that well--and my Kohler Almond already pushes that to the limit also), but harmonizes with calacatta due to random elements with white/black/purple.  The Berlin Oyster Bar never pushes the orange problem in the first place, but only weakly accepts black.

I quipped above that when one ultimately does replace a vinyl floor, it's an opportunity to try something different, or not to try something different.  Well actually I love the pattern of my existing vinyl floors in kitchen and both bathrooms.  The pattern is of 1.5 inch hexagon tiles with slight distressing and wide grout lines.  I don't know how the floors were originally (my mother and I bought the house when it was already 8 years old and noticeably abused) but even now they have some grip…and it is largely because of the close spaced faux grout lines.

Now even if I could get an exact replacement for the bathroom vinyl, I wouldn't buy it because the color is not quite right for the Calacatta.  I was planning on living with the mismatch (until it became clear I'd need to replace the floor) but it wouldn't be worth repeating giving the new shower tile.  The color is too yellow/orange for the calacatta.

But what might have been cool would have been a similar hex tile with gold veined calacatta.  I've seen real gold calacatta in hex matrix for sale.  That would be cool but high maintenance.

But I am puzzled why the basic hex tile pattern seems to have completely disappeared from both the Armstrong and Congoleum catalogs.  It is a grippy yet elegant pattern with infinite variations possible in color and distressing.  Has it become too 1980's?  To me it seems like a timeless pattern, and if it had been available in a grippy top line vinyl I might  have preferred that to the random Alvina--which has a kind of casual mountain lodge or vacation spa look which maybe I will get more used to but wasn't really something I had been seeking.

In my mind, though, I've created this image where my bathroom door is really the gateway to The Spa. The highlight in the Spa is the Shower/Bath.  Though the Shower Bath is an elegant classical structure, the floor that leads there is modern casual.  Welcome to my eclectic palace (and this is hardly the exception)!


Saturday, December 20, 2014

Bathroom Flooring

Bathtub installation tore the flooring near the door.  Also, the toilet is being replaced.  The only reason not to do the flooring at this point is that I'm not not not replacing the vanity, and a future vanity will likely be smaller.

I want vinyl.  Vinyl sheet seems better to me than plank flooring for bathroom, despite the assurances from plank flooring people that it's great for bathrooms.

The best Armstrong I've seen is Milan  in the darker X4A18 color.  The white color might be better for bathroom, though, but I don't really like the white, so I'd choose the X4A18.

The Best Congoleum I've seen is Panning for Gold.  It bugs me, though, that the virtual tiles are too large.  I think bathroom should have the smallest faux tile pattern possible for better handling of shower splash water.

So I'm choosing the Armstrong Milan tonight.

Wednesday, December 17, 2014

Fixing the missing insulation under the new tub

Tub work is now entering 3rd day.  On the first day, the tile demolition team arrived at 9:30am and were done by 10:15.  They removed all the old tile, but left the sheetrock just above the tile.  I called Carrillo and they said that was OK.  Considering the mess that must have been made, they left everything amazingly clean afterwards.  The old fiberglass insulation was looking somewhat rotten in places, but I doubted it would make much difference.  I spent much time thinking how the niche was going to be installed in the somewhat off-centered and peculiar space in the side wall, but in the end decided it would just be a bit off-center and my plan (as of Sunday night, when I had previously emailed Naomi) was still good, that is for 12" wide nice that's 28" high with shelf in the middle.  (Naomi said the shelf would be made of the tile itself, so no trouble with color matching.)

On the second day, plumbers arrived around 9:30, took a one hour break around noon, and left around 4:45.  They removed the tub and toilet and installed the new valves and water lines connecting to the spray head and spout.  They had quickly sealed the existing water pipes (1/2 copper) with caps in the morning so I can't even remember how short the water was off.  They dug out the tar in the tub drain and put new drain into place and aligned it to tub (by lowering tub a few times).  They soldered in the new toilet flange (the old one had been merely crimped on, not soldered, so no wonder the toilet had often felt loose).  When they left there was still a smell of flux in the air, but I left doors open to the garage and my efficient ventilation system took care of it quickly.

Around 6:00 my friend took a look.  She was appalled at the appearance of the old insulation.  She asked me if they were going to fix that.  I said that nobody had said anything about it, and the plumbers surely weren't going to replace it.  Since I was not doing this project through a general contractor or builder, just a plumber and tile company, I didn't think there was anyone to fix the insulation.

Looking some more, I also realized there was a missing piece under the tub near the front of the tub, actually in the plumbing drain void in the house…a particularly bad spot for missing insulation.  Cold air leaking in through there would reach all under the tub and the bathroom and kitchen walls, and perhaps even deeper into the house.  I remembered later how this piece got missing--it was my fault!  When my mother and I bought this house in 1992, it had been badly treated.  There were openings behind where a refrigerator would go.  (I didn't learn until later that these openings are often needed for plumbing and extermination work.)  The bottom opening, wide open, had a large ant mound inside.  I dug out the ant mound, and then I started pulling on something that seemed like fibrous garbage.  Before I could see what I was doing I had pulled out an old rotten piece of fiberglass.  There wasn't any way to push it back in from there.  I soon forgot about that amidst all the repainting and minor repairs.  The first handyman we hired plugged up the holes with with sheetrock.

In the years since, I always wondered why the bathtub seemed so much colder than the bathroom itself on cold days.  Cold air seemed to be coming from somewhere.  The tile around the tub also seemed especially cold.  The lack of insulation in this critical part of the house could even have caused the deterioration in the tile itself (though, shower water leaking through increasingly large cracks could also explain it).

I never would have thought that underneath the bathtub the wall wouldn't even be finished, making the insulation there even more important.

Around 7:45 PM I went to Home Depot and selected R13 insulation (I picked the nicest looking roll, many were half open, stained, etc), a stapler and staples (I had only recently discovered my old Arrow T50 was broken), a dust mask, and a pair of garden shears and a new pair of gloves.  Though the correct way to cut fiberglass is somewhat involved (you are supposed to cut with on a scrap piece of plywood) an easy way is with garden shears, as I had just read online, and I had just one piece to cut, 13 inches long.

After Home Depot I went grocery shopping and got home around 9:45.  I watched a short video on how to (mostly how not to) install fiberglass insulation.  Sometime around 11 I started working on replacing the fiberglass piece and I was finished around 1:30AM.  I put towels around the work area and cleaned out the weeds that had grown into the void and some bits of old insulation.  Putting on mask and gloves, I removed the roll of R13 from the car and cut off the plastic cover with regular scissors.  I marked 12.5 inches with scissor cuts then cut somewhat crudely, intending to fill the gap below with a second piece.  I took the piece and pushed it into place.  Well I had failed to notice that there was a gap above the piece, so it was more than 1/2" short.  I pushed up a little hoping to push the piece into the upper gap, but that didn't work very well.

This was where it started to get complicated and difficult.  It was hard to cut a very short piece that was very straight, and where the fiberglass was cut to the same length as the paper backing.  Mostly it wasn't.  Finally I filled the bottom with several pieces, and some extra paper where the paper backing had come off.  Then I noticed that the far side was short too.  For some reason the spacing for this inner void was actually wider than the normal 14.5 inches between studs.  So I cut some pieces to fill that.

Here I had an idea which goes beyond typical construction (not that my actual work does).  It occurs to me that I want all open airspaces like this void to have paper in front of the fiberglass.  The paper protects the airspace from fiberglass breaking off and going into the air stream.

When I had pushed the pieces into the far side of the gap (which was also hard to reach) it left a big piece of visible fiberglass.  I fiddled with this for the longest time.  Finally I decided simply to cut off a new piece of paper (with fiberglass on it) and press it over the exposed pink.  I did similar work on the near side where there was visible fiberglass after stuffing another piece underneath.  All this extra fiddling was at least an hour's work and I even had to take a break to wipe of perspiration.  I also tried to stuff a bit of insulation into the gap above the piece, behind a horizontal 2x4, but that didn't work well and I gave up easily.  It was hard to work in such a tight space, being careful not to touch any of the new plumbing.

By code, I didn't do a great job, maybe not even passible.  But by my standard, I at least did get all the visible fiberglass covered with paper.  And the insulation work, if not great, is at least far better than nothing.  I may have squeezed too much fiberglass in the far side, but not enough in the gap up above the main piece, and I think those were the biggest technical weaknesses.  I continued looking for awhile and took pictures.  I was thinking I could already notice the difference in warmth and lesser transmission of noise from the refrigerator.  That was probably just my imagination.  WRT the noise, it now seemed to be coming from the ceiling instead of from lower down.

Even though the energy savings will probably never be as great as the cost, I think it will be nice for the bathtub not to be so cold in the future.  My version of construction goes like this.  I get the best professionals I know to do the big jobs, then I do little bits of detail work, sort of like extra hot rodding.  That's because making my home is art, not genius.  I once got a fortune cookie which said "Art does what it can, Genius does what it must."  On my home, I do everything I can to make it nicer.

I emailed the tile company about the ratty looking fiberglass above the tub, and they said they would fix that when they come out to do the tile on Thursday.