Lyndhurst Garden House

Lyndhurst Garden House

Friday, March 13, 2015

Reveal makes the Grass Green

LED Reveal light is great as outdoor security light.  It makes the grass green, looks less yellow than incandescent lights, and far better than typical even-more-yellow looking LED lights, and blue looking fluorescents.  Incandescent lights make the grass look yellow (highlighting the thatch) and even incandescents may not make the lawn look as nice as the Reveal does.

(Corrected.  Reveal light doesn't make a punchy green as many incandescent and LED's do.  What it does is suppress the yellow.  So if you have a lawn which is 50% yellow thatch or winter die-off, Reveal suppresses that and makes the green relatively but only relatively more prominent.  I think this looks nicer and richer but YMMV.  It does tend to make the green/yellow lawn look darker overall and whether this is good is a personal judgement.  My real message here is "It's worth it to use a tailored light to make your yard look nicer at night."  Reveal may not always be the answer, and I intend to try different things.  I'll have more to say about yard lighting in future posts.)


The BR30 bulbs however aren't nearly as solid looking as the weather rated 95 watt PAR38 Halogens they replaced.  The electrician installed the halogen lights in preference to standard 150W PAR38, which also generally come with a weather rating.  They don't fit the flood light holders as well as PAR 38 which is probably a disadvantage from a standpoint of keeping the bulb safe.  I do wonder how long the Reveal BR30's will last outdoors.

Here's a comparison of BR30 and PAR38.  If GE ever makes weather rated Reveal LED in PAR 38 in a modest output like 75W or 90W equivalent, and I think they should, I'll buy that.  


Wednesday, March 11, 2015

Quick Notes

Lots of stuff is being thought of, anyway.

The Shower Curtain Rod

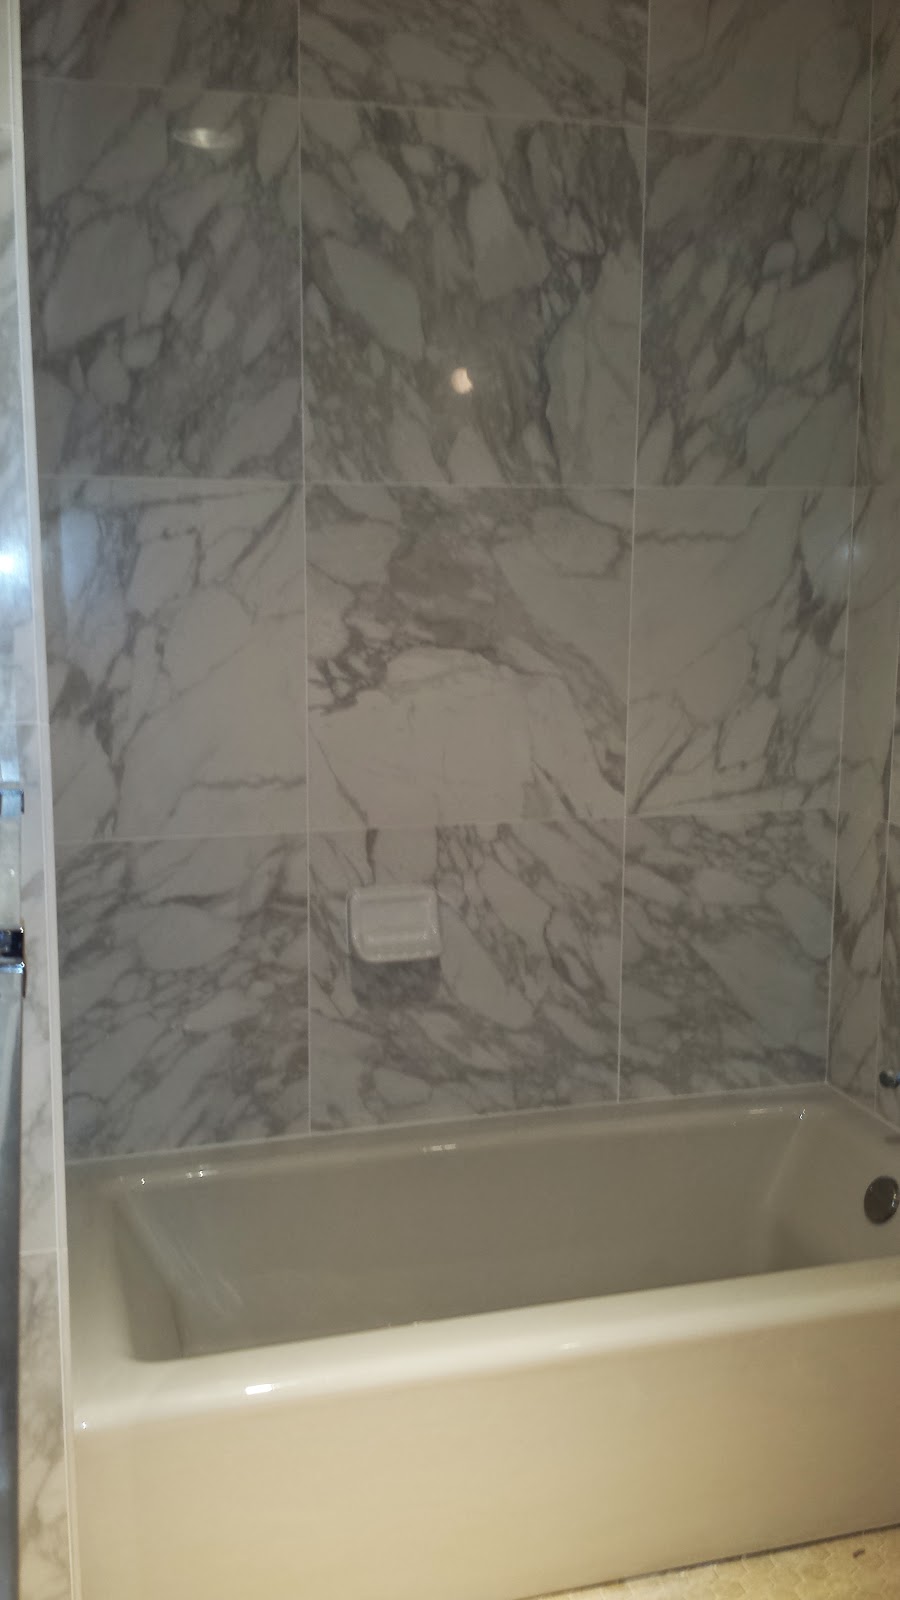
The King's Bathroom is a triumph, if I do say so myself.  But I still have to buy the new shower curtain rod.  Many have been considered.  I saw an angled shower curtain rod, and realized that might be the best.  But it's only made by one company, and they don't stock the 5 foot size.  So back to curved rods. I've decided on the Proflo curved rod in brushed nickel.  Unlike the Kohler and Moen shower rods, the Proflo rod is a single piece, so no transition in the middle (ever notice how makers of these rods also try to sell you ball bearing style shower curtain hooks…you might need those).  There is a bit of adjustability in the end pieces, which are relatively large.  Fortunately, the large end pieces also have a bump beyond which you can hook the last curtain hanger.  It looks well designed, and in addition to coming in the Brushed Nickel finish I like (many others only offer stainless finish) it comes in two model numbers, one having 304 stainless steel and the other using 445 stainless steel.  This was an interesting opportunity to learn about stainless steels.  Mico Metals makes 445MR and discusses it here.  The 300 series (304 and 316 manly) have the largest amount of nickel and are non-ferromagnetic.  The 400 series have more Chromium and are mostly magnetic.  It is sometimes claimed that the magnetic stainless steels aren't as resistant to rust, but it varies by the exact composition, and recent alloys are getting better.  Stainless in the new 440 range has so much Chromium that it may be better than 316, which is better than 304.  (Here's a another discussion of all types, though not including 445 specifically, only 446 which has the max processable chromium.) So I chose the 445 stainless over the 304 stainless model on the belief that it is better (despite less of the now expensive nickel).  The 445 stainless is also "more like steel" though I'm not sure if that means it would be stronger.  But overall the Proflo rod looks as good as any.  Commercial supplier Bobrick makes straight 1 piece shower rods in 304 with simple end pieces.  FWIW Signature Hardware (a retailer) also has a one piece curved rod, but with much smaller end pieces than the proflo--which is possibly an advantage.  It almost looks like they just simplified the end piece of the Proflo (or took part of it off).  With that unit, they say you may have to cut the rod, equally on both sides, to get it to fit any particular shower.  While my builder might do that OK, he might also be angry about having to do it.  I've also seen a number of other rods that look similar to the Proflo, but usually more expensive.  I'm beginning to think of Proflo as one of the best brands btw, even though it is "just" the Ferguson house brand.  My builder says he can install the rod for me this month.

I've started the bath and shower a little even without the rod.  The 32x60 Bellwether is the perfect size for me, at 5'6" tall, and it is wonderfully comfortable for me.  But unlike my previous thinking, it might not be so good for someone just a few inches taller.  I can spread my legs out flat but only if I'm sitting somewhat up.  So if you are 5'9" or taller, you might be well advised to get the 32x66 Bellwether.  And if you're over 6'3", you'll have to get a 72" Tea for Two.

The Delta shower head is all I hoped for.  It gives marvelous wetting without being too harsh or sloppy.  It doesn't have a needle adjustment AND it doesn't need one--it's just right.

The Delta controls are nice, but the shower control is adjusted so I can just barely get the water hot enough.  If I replace the water heater and go for higher temp (I don't think I should change the temp in my 8 year old water heater for reliability reasons) it would be just right.

The Bathtub Spout

When the bathtub spout is run the water goes straight to the drain.  At first I was very disappointed and was thinking I might get a shorter spout.  But when taking bath you put in the stopper anyway, and the metal stopper I have is ideal.  The water hits the tippy top of the stainless stopper…and spreads around like a daisy.  It couldn't be better than that.  If I had a rubber stopper, however, I worry that the water might leach out oils in the stopper and pollute the bathtub a little (probably too small to measure with the most sensitive instruments).  When I was first obsessing about this for a long while, I then laughed "and to think I'm not worried about the miles of scale the water travels past in the water piping!"

Anyway, I removed the lift-and-twist stopper (ProFlo) from the tub by turning it.  So I can put a drain strainer over the bathtub drain as I usually do.  Then I removed the stem from the stopper, and now I can use it just like a regular stopper.  It works great…kept the water in the tub for a whole day without losing an inch.  However it's slightly unstable when you are in the tub, and a glancing brush might cause it to tilt enough to start leaking water.  Also I'm slightly worried about dropping the metal stopper on the tub…that could cause a nick.  But I plan to be very careful with it.

My intent was that the water would shoot past the stopper.  I had been thinking about a straight line from the spout (which tilts at a 30 degree angle from vertical).  But the water doesn't have enough pressure to travel in a straight line…it curves down right into the drain.

Anyway, with the spout like it is now, the spout can also pour water on my feet, which is nice.  If I got a shorter spout, I'd have to stretch to reach the water flow.

LED Lights

I've been playing a lot with LED lights.  I got a set of hue adjustable and color temperature adjustable bulbs from LimitlessLED.  They work very well, and I can adjust the color temperature to something I like better than most LED's.  But the 9W Dual White was not really bright enough for the single lamp in the living room (though it didn't seem much different in total light output from the Verilux 20W fluorescent it replaced).  I'd often noticed during my parties that when the sun goes down and the living room light automatically switches on with the Verilux bulb, everyone's faces looked even harder to see.  The Limitless was a bit better, but not much.  So then I got a CREE 100W equivalent LED (less than 20W actual) and immediately it was a revelation--so much brighter mainly--and it outputs as much light to the ceiling as around which is more helpful than anything (since the lamp is in a frosted torchiere).  I think the Verilux output too much light to the sides and not enough to the top.  I didn't really like the yellowish tone of the CREE at first.  But my friend loved it and insisted that I keep it.  I've be studying spectrograms of light bulb outputs and hope to write an article about just that.  Bottom line, neither color temperature nor CRI as usually stated are as useful as I used to think.  Pure incandescent bulb output (which has CRI of 100 at 2700K, fwiw) actually isn't as bad as I used to think.  The CREE seems to have a much better spectrum than the first generation Philips LED bulb (which I hated), though I didn't think so at first.  Funny the Home Depot website said they were Outdoor rated…it doesn't clearly say that though it does say they are not to be exposed to water or the elements.  Inside a pair of floodlight shields…I think that's not considered "exposed to the weather" though you might also argue that it is.  Only the 90W equivalent Philips said it was designed for outdoors on the box…and it had an awful plastic looking top where the GE is glass.  They are wet rated but not to be "exposed to water."  I may be pushing it.  Once again I think that's true of most bulbs put into floodlight holders.  The base of the bulb is protected from the elements by the enclosure and a rubber boot, pointed downwards.

For better security, for both me and my outdoor cat, I've changed the motion detector light on the north side to dusk-to-dawn.  I'm replacing the halogen bulbs with 12W GE Reveal BR30 floods.  These get higher marks than the CREE flood lights for reliability.  I know the Reveal method doesn't actually give you anything like daylight (nor do "daylight" bulbs, though at least they try in a straightforward way) but I find I like what the Reveal does, and a less yellow looking security light is a plus IMO, I think it may make the yard look better inside and out at GE but I can't seem to link to it (combined sun and sky peaks in the blue green, very unlike incandescent which rises from blue to red in a straight line…and of course on into infrared with even more output), compared to Reveal, which is weird looking, but closer to sunlight than incandescent in having yellow about the same rather than vastly above blue green.

I finally ordered some Solux 3000k halogen edison style bulbs for the house.  These might be great for vanity lighting.  I had been thinking about trying the living room also.  But I wouldn't go through very many for routine dawn-to-dusk security use as the living room lamp does now.  An LED of some kind is bar far the best choice for that.  Possibly I could have a separate fixture for the Solux.

Cat Safety

I've been making small changes to make the house more cat safe.  I removed the old AV wires that used to run underneath the kitchen cabinet (cat liked to mess with those).  Actually, they hadn't been used since I installed the new whole house A/V/D networking in August (!) 2013, but it just took until February 2015 for me to get around to removing the old wires.  I also removed the package opening knives I used to keep at the bottom of the living room bookcase.  I put those inside the kitchen HVAC cabinet.

I've discovered the need for locks for the bifold closet doors in the Queen's room, as the cat opens them when left in there.  Kid'sRUS has nice bifold door locks that go at the top of the door.  But my closet doors are actually much thicker than those must have been made for.  Even adjusting the knob to the widest depth, they still fit too snugly to be moved easily.  So I took out the inner adjusting piece, and replaced it with one or two strips of Velcro, which has about the right thickness and slides easily but not too easily.

The precarious "system" I had of "temporarily" suspending the Ethernet-to-HDMI extender from the TV via a pair of rubber bands gripping around the extender and through the hooks of the release cables of the TV wall mount…failed spectacularly, then was recast and kept losing one or the other bands due to slippage under consistent cat play.

My computer club friends came up with the solution…velcro.  Actually I used the strongest grippy fasteners from Scotch, which seemed appropriate to simply holding something on hard (though, I did spend a lot of time pressing on the plastic of the TV…maybe Velco would have been as safe with less pressing, enough so I might have pressed less).  I had to buy more because I mounted in a bad spot for attaching TV to wall.  On Monday I reattached and rewired the ethernet and HDMI cables.

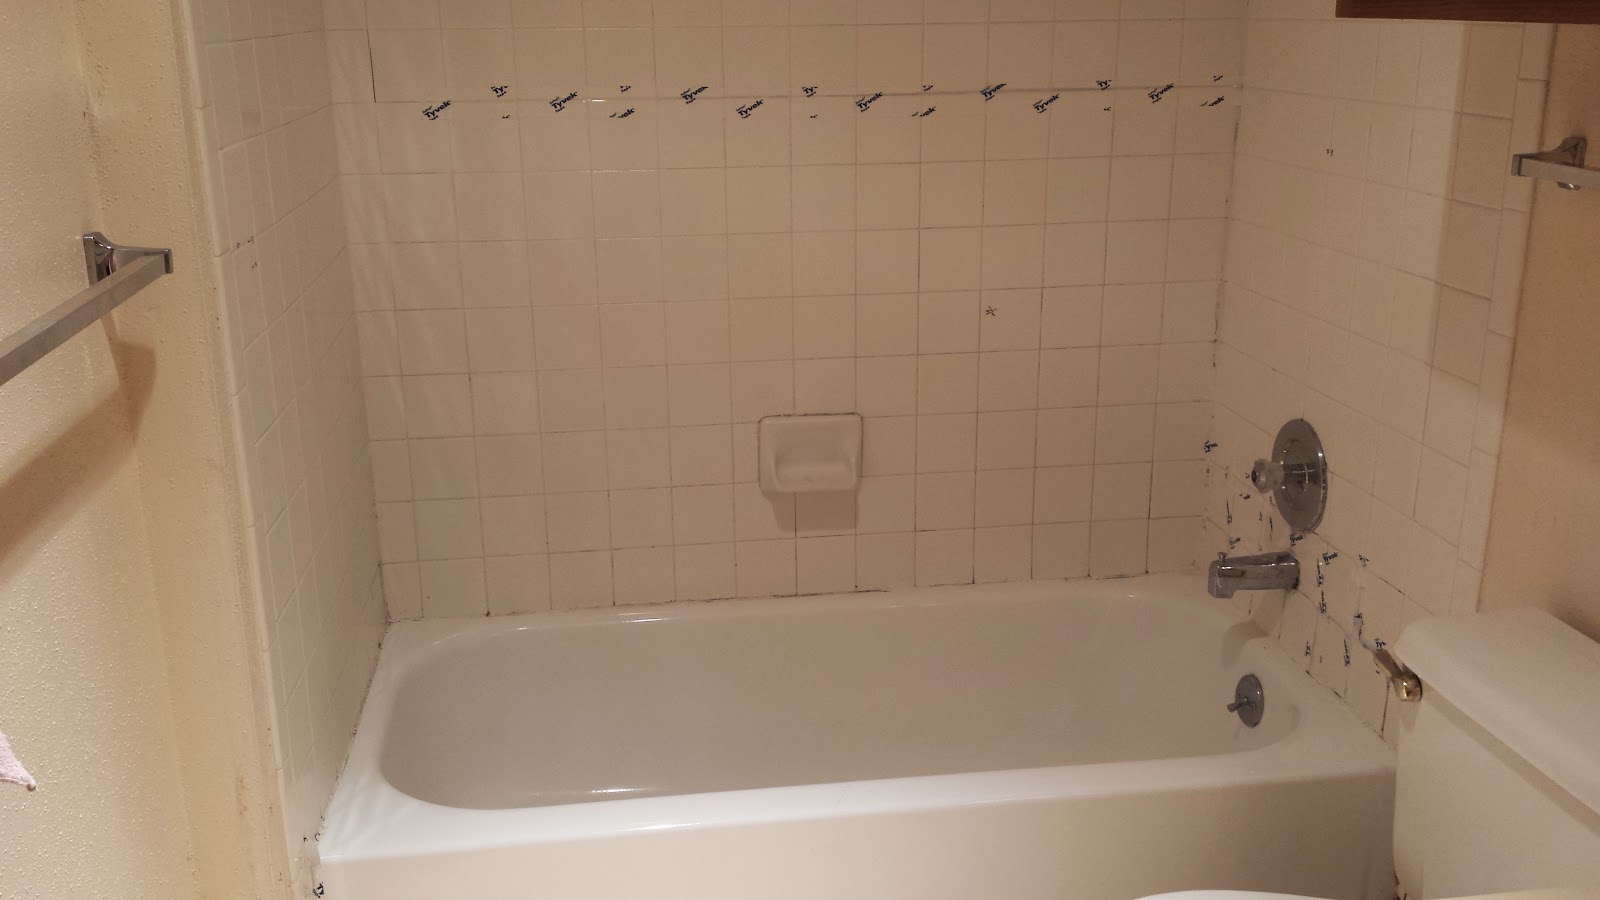
Kohler Toilet Seats…that sinking in feeling.

I love my new Kohler toilet with Flushmate.  But the seat is horrible.  It makes me feel like I'm falling in to the toilet, which raises my legs (the front edge of the toilet being the fulcrum) so that my legs can barely reach the floor.  (After writing this, I decided the worst aspect of the seat is actually the raised front part because it hurts my legs, not the sinking in behind.)

Now I recall the plumber asking if I was sure I really wanted at comfort height toilet.  (Of course…what a silly question.)  Well perhaps Kohler designed these seats so it's almost like having a 2.5 inch taller toilet.  So many people could get away with the shorter toilet with these seats.

But what a way.  I hate it.  The perfectly flat, thin, and smooth seat on my American Standard Champion 4 is far superior.  I ordered a special Kohler "ergonomic" seat.  It seemed better but still too edgy and falling in.  So I ordered an American Standard, in the "Bone" color which Terry says is the matching color to Kohler Almond.

Update: The American Standard seat is everything I hoped for.  The Bone color matches Kohler Almond perfectly.  It fits OK though seems a mm or two smaller than the Kohler seat, which is fine. The seat is perfectly comfortable with no gratuitous slope.  It seems like American Standard has not changed the design since I bought the Champion 4 toilet in 2009.  And that's good, because it is just right.

I previously complained about how seats (the old wood and plastic kind) could have a bottom inward edge, and how that would hurt.  Well, now, it almost seems Kohler has gone over backwards to avoid that…the bottom edge is a wrap around curve.  But way way too much of a good thing, and it really isn't an issue with plastic toilets anyway due to the edge rounding.

Notably I started the King's Bath upgrades over a decade ago with a Kohler faucet, and now I have Kohler tub and toilet.  But if they can't do the seat right, and I know American Standard does.  At least I hope they still do.

Otherwise I like the color, style and massiveness of the Kohler toilet.  It reminds my of a rich friend's house in the 1960's.  But also, the detachable tank rests on the bottom plate leaving a 1/4 gap underneath the tank.  Crud might build up under there and never get cleaned out.  I like one piece toilets which avoid this issue (my plumber chose this toilet model after I told him I wanted comfort height and elongated bowl).  Apparently my plumber likes two piece toilets and isn't worried about cleaning the gap--that's a customer issue. In the two-piece American Standard Champion 4 in the Hall Bath the back edge of the bowl rises so that the junction between seat and bowl is elevated and tight, removing the cleaning issue.  Though for actually cleaning what's visible, the Kohler gives you a nice space to clean, and in use the bowl tends to stay cleaner than my Champion 4 (the Kohler has Flushmatic).  I think the Kohler has a better porcelain.  But no reason not to have better toilet seat design.

Here's an interesting Shaving Mirror.


Sunday, March 1, 2015

Simple Green and other Bathroom Cleaners

Simple Green All Purpose cleaner doesn't mention bathrooms on the bottle but I thought I'd take a chance and brought it home.  In fact it is a strong (though non-sterilizing) cleaner.  Strong yet easy on the hands, and not as bad as some on the eyes and lungs.  This is a very strong cleaner full strength when you actually need serious cleaning.  The nicest thing of all is that it doesn't run when you spray it full strength.  I like it.

The Green in the name refers to the fact that the product is (highly) biodegradable and less toxic than some (no bleach, ammonia, or similar harsh chemicals).  Virtually all bathroom cleaners are biodegradable now, and many are little harsher if any than Simple Green.*  However the Simple Green actual ingredients appear to be anything but "natural," so don't think of this as a natural or organic product.  It's not really simple either, a better word would be sophisticated.  The main surfactant alcohol, 2-butoxyethanol, has been used in many cleaning products since the 1930's.  A better way to think of this is as a thoroughly modern cleaner made of a cocktail of modern synthetic ingredients that do the job well without being harsh or toxic, and is not too bad for the environment.  Some other (now less common) bathroom cleaners contain little more than citric acid and may actually be simpler and greener.  But whenever you have special lime or soap scum removers or sterilizers you do have something more harsh.  Strangely, despite the essential claim of environmental friendliness, the inclusion of a phosphate means that it has some potential ill effect through the creation of algal blooms in waterways. But here, the Tetra Potassium Pyrophosphate is a secondary ingredient, in relatively small amount, so it has much less algal bloom stimulation as, say, pure TSP (which is also used as a cleaning compound--when you need serious cleaning).  Phosphate containing cleaners are best dumped on one's own lawn after use. It looks like Simple Green is well disposed of this way since it doesn't seem to contain anything that would hurt your lawn, even the TKPP is potassium rather than sodium based also, which would generally be better for lawns.  (TKPP is a well known industrial cleaner with similar performance to TSP.)

UPDATE:  The web is full of websites blasting Simple Green's claims to being not toxic, largely on the basis of the ingredient 2-butoxyethanol, less than 5%.  In 2012 Simple Green finally (after how many years?) decided to remove the 2-butoxyethanol.  While it had that ingredient (click for MSDS), it had a 1 safety rating for health (1-0-0).  The new formula (click for MSDS) has a 0 safety rating (the best) for health according to the newest MSDS and is not expected to cause respiratory, skin, or eye irritation, so the rating is 0-0-0.

Likewise, the standard for environmental friendliness has moved on from "low phosphate" to "no phosphates--long ago actually, and finally the new Simple Green formula has done likewise, taking out the TKPP.

The new main surfactant is Ethyoxylated Alcohol, which is notably less toxic and irritating than 2-butoxyethanol.  Some of the other ingredients change also, possibly to compensate for the loss of the original somewhat harsh surfactant.  There is now citric acid in addition to sodium citrate.

So you read it here.  Simple Green was actually a slightly irritating and toxic and phosphate containing cleaner until 2012 when it decided to clean up it's act.

*Mainline bathroom cleaners are subject to fads and the formulations change every few years.  Some years they contain simpler and less toxic formulations.   Not long ago Lysol Bathroom Cleaner used only dilute Citric Acid.  The recent fad is for bathroom cleaners to have bleaches and/or other sterilizing agents as well as specialized cleaners.  Simple Green is safer for users and the environment than these pumped up cleaners.  In anything other than a hospital environment, sterilizing agents are unnecessary.  While common, bleach is one of the most toxic substances found in a home and should be avoided if possible.  Cleaning agents with bleach or sterilizers may not be good for your lawn.


Saturday, January 24, 2015

The Bathroom Vanity

I am still not planning to replace the master bath vanity any time soon.  And now that I have tile trim moulding entirely around the bathroom floor, including the toilet side of the vanity, the vanity is pretty much grouted in place.  (The tile trim is fabulous btw.)  The new bathroom is very very nice in what has been re-done.  The vanity, finally painted after looking rotten for 22 years, is at least finally acceptable in civilization.

One thought that came to mind, however, is vanity topped with the same Calacatta Porcelain tile as in the shower, with a bowl sink.

One set of ideas I like a lot is that the sink should be higher (I can barely reach down to existing sink, surprisingly enough since the vanity appears low) and less prone to splashing.

Another way to get to less splashing would be a wider sink.  I find the 7th bathroom photo in this blog to look especially nice, with extremely wide porcelain sink that also fills up the front-to-back depth.  (Most of the other bathrooms look kitchy, with less in the way of practical ideas.)

So then the sink should be not a round bowl, but a large square sink, nearly as large as a kitchen double sink, filling up the entire depth, as much as possible, and raised, with faucet at chest height.

Thursday, January 8, 2015

Weather Stations: Real and Gadget

netatmo looks cool, and might be worth getting, but it's really a gadget.  It has interesting indoor and outdoor air quality features which are interesting (but once again, not Real air quality features, just surrogates like CO2).  Just to get indoor/outdoor temperature and humidity on a tiny screen, you'd be paying about half that much anyway, and this is cooler, so may be worth getting anyway.

The cheapest Real Weather Station may be the Davis Vantage Vue.  I may save my coin for this.  It looks better made, has way more features.  I won't sweat giving up the indoor CO2 sensor too much.  Made in USA and the outdoor unit is solar powered.

The next model up Davis has more optional features, such as solar level tracking.


Tuesday, January 6, 2015

Armstrong Alvina is Grippy like it looks


I have the Armstrong Alvina Buff flooring installed now, and it is everything hoped for.  It is beautiful and my friend likes it.  The color blends with both Kohler Almond and the Calacatta Porcelain tile.  It works with other colors like my wall paint and black also.  And, as I hoped, it has a grippy texture.  It is noticeably more grippy than any of my existing vinyl flooring.  Not just in the faux grout lines, which do have a helpful slight depression as expected, but everywhere.  It has a grippy look and a grippy texture, and in no way seems like a cheap product, despite not being in the most premium line (which didn't seem to have anything like it).

The floor guys quickly agreed to caulk the bathtub seam using the GE Silicone II Almond Door, Window, Basement I had purchased, which has the required mold protection as well as being 100% silicone.

I know this is not the recommended Tub and Tile caulk, but it similarly has mold and mildew protection, it says so in bold print on the label.  Given that they both have mold and mildew additives, what is the difference?  Does the Tub and Tile have more mold protection?  It is unclear, but the Tub and Tile does have a specified mold warranty.  Perhaps the warranty is the only difference.  It would seem that they couldn't say mold protection if it wasn't fairly universally effective…some outdoor climes are worse than bathtub.  Perhaps tub and tile is softer so it can work with hard tile?  Not a problem in my case since I have vinyl flooring, not really tile.  So perhaps for me Door & Window is the preferred choice because I'm not really sealing porcelain to tile.  Anyway, I don't think it should make much difference so long as I have the floor cleaned regularly and keep the caulk intact.  I erred in not buying the exact recommended choice, but it hasn't seemed worth making another trip to Lowes to get the other kind instead when in this case there is little explicit difference.  I've read some guys say they use "all purpose" for everything, even the bathtub seam.

It didn't look like a perfect caulking job either.  Perhaps that's why the store recommended the tub strip.  The flooring guy said right off it could use a second covering of caulk.  I'm not sure if that's the right thing to do, usually caulk removal is recommended more than adding to caulk.  I had purchased some tiny backing rod (which might have been to large anyway) but never got around to offering that…the flooring job was done so fast.  Tom re-did the caulking.  I'm not sure about perfect anymore, but I think it's good enough now.  It might have been better done with backing rod as I had purchased but never got around to advising the floor guys about.

Technically, I bought Armstrong Lacerta Carrera, which the store (a top tier Armstrong dealer) said was identical but gave me a Lacerta Gold Warranty.  As far as I can tell, it is the identical Armstrong product, listed on Armstrong website, with the identical 15 year warranty, but part of the Lacerta collection sold by certain stores.  The stores possibly get a cut on the advertising and warranty when they sell Lacerta (which they have samples for) and the warranty (which they are expected to provide).  Though listed on Armstrong website, if you start from the top of the Armstrong website you'll see the Alvina Buff instead of the Lacerta Carerra.  I actually did my searching and deciding on the website, though I did ultimately visit the store to see a sample.  They wanted me to see a sample, I said I couldn't make it that day, but ended up going to the store anyway and they had sent the Carrera sample to another store so the saleslady could snap a smartphone picture for me.  But at least I was able to verify the texture.

The randomness of the Alvina fits the Callacatta Porcelain tiles also, in a curious kind of almost photographic negative way, though nothing comes close to the Calacatta tiles in inspiring endless and effortless hallucination.  What objects can you see pictured amidst the dark colored veins that change slightly from different angles and in different lights?

No photograph I've been able to make with my smart phone fully captures the way it actually looks.  The photo on top is with the halogen ceiling light (used to be "heat light") running, which gives nice colors except the main beam is in front of the tile and causes the flooring to wash out a bit in the photo and look whiter than it is toward the bottom of the photo.  That was also w/o flash.  Here's are two with and without flash, using only the vanity light (now with two bulbs).  The vanity light gives the bathroom a very warm hue, but not quite as overwarm as the picture looks.


Tile, tub, and floor colors work in any light, and probably even better than shown, if still arguably not perfect.  But the floor works as well with both tub and tile as anything I can imagine, since those were already pushing the threshold of matching (but still do, I think).

It's beautiful and comfortable.  Two days after installation I'm beginning to see it as more "premium" than I did originally too.  It doesn't look or seem cheap in any way.  It has comfortable padding but not so much you worry about it.  (Less give than the Luxe Plank Best with Quiet Comfort underlayment I have in the King's Room itself, but the give is more localized around the contours of your foot.  You can barely feel the padding, but it adds to the comfort.  The texturing is more than any other floor I can remember, secure but not rough on feet.


Covering the Holes instead of Filling them

New Tub and Calacatta Porcelain Tile
I am very happy with the new tile and tub in my master bedroom.  It's beautiful!  Everyone who sees it is blown away by the fantastic beauty of the Rex I Bianchi Calacatta Porcelain tiles filling the entire shower enclosure area including the furring inward.  Those tiles must be experienced, with their wonderful endlessly complex patterns and varying color depending on light and angle.  Close up the lines do not appear black at all but grey and/or gold.  I think the Kohler 32" wide Bellwether tub in Almond is fantastic looking also.  I still believe Kohler's Almond 47 is the prettiest color even if it might not match the tile as well as ugly Kohler biscuit (I have never done the comparison actually) but Almond matches close enough and even helps bring out the gold in the tile up close.  With contoured front and back, the 32" Bellwether is a mini Tea for Two and has comfort as well as ultra modern looks.  The valve trim is not yet done.  The tile setting and grouting is done very well if not to museum perfection, well enough to let the tile on the back, especially, speak for itself.  The niche in the left side is wonderful and convenient but the cuts required were not laser perfect and there was even a tiny bit of edge chipping on the detailed cut pieces, and fraction of a millimeter misalignment.  I'm being picky here to give you the full picture.  But the back is mostly made of full pieces which look perfect, and the right side looks perfect also.  The tile reaches and is sealed to the ceiling, as is the backer board (by request).  I would consider this A class work, if not A+ (and the general helpfulness of the tilers would entitle them to an A+ for overall service anyway, in my grade inflated evaluation, despite details described below which are typical of almost all contractors).  The Tile is A+++++, the best.

It's hard to get a full height picture with my cell phone because of limited wide angle, so the above was the best I did before the new flooring installation, intended to show as much height as possible since the new tile goes all the way to the ceiling.

My initial impressions are also that the bathroom is less cold than before.  It has an engineered vent to my HVAC system (by the book) and no exterior windows.  So you'd think it would be as warm (when cold out) as any other interior room.  Yet, before the new tile it could sometimes be a bit on the chilly side, mostly probably due to air leaks in the broken tile wall and up by the ceiling.  Now there are no visible leaks, and the tile seals all the way to the ceiling.  The final tiling job was done much better than I was thinking while it was being done (there may be some inconsistencies in the tiny grout lines…but I am seeing far worse in commercial work elsewhere now that I've started looking at grout), including the sealing to the ceiling.  Previously there were big holes near the ceiling where the original track home builder covered a generous ceiling gap with lightly mudded paper which was tearing to shreds over the years.  And sealing is more and more understood as the most important part of insulation.  The photo before demolition below unfortunately doesn't show the ceiling paper cracks I'm describing

Original Tub and Tile Just Before Demolition
But I know it's not perfect underneath.  After the tile demolition I sealed, mostly, an uninsulated exterior panel behind the plumbing void that runs down the center of the house and also opens up into the under-tub area.  I think that might have helped a lot.  That one missing piece near the access panel through the refrigerator bay has a long story behind it…I removed the original piece 20 years ago when we bought this house as abandoned and I was clearing out an in-house ant mound behind the refrigerator bay, or what seemed to be an ant mound, and I started pulling on something awful looking, which turned out to be a piece of insulation.  I pulled out the entire piece and intended to fix it, but forgot after a few months.).


Corner behind and under old tub had missing insulation
(upper middle of photo)
Insulation fixed by me, with bottom and side pieces to completely fill gap
(however, space behind beam above is not filled, I hadn't counted on that space)


But I had been hoping to get most of the old ratty looking fiberglass above the tub replaced.  I had held back on making any requests in this regards, figuring it was too late to get someone who would do it right (my builder Tom).  After the demolition, the rightmost panel of fiberglass had rotten looking paper, but most fiberglass backing was intact, and the exterior was fully stuffed.  I figured the rotted looking paper was largely a superficial problem of little consequence to insulation quality:


But then after the tub had been installed, the paper had gotten quite torn all around, especially where it had been rotten looking before:

Right side, after new tub installed

Left side, after tub installation

Then, the day before the tile installation began,  I asked the tile company about it, and they said they would replace the bad insulation.  I offered to let them use my barely-used roll.

I told the installers about this, and they agreed.  I said at least the first two rows, maybe everything.  I saw the first (and most torn) piece of old fiberglass going down the hallway.  Than another.  Maybe more, I closed the door after that point.  But I didn't actually watch the work being done, until much later when the door was open I peered in.  And what I saw was that only two of the stud bays showed new fiberglass, and one of them showed a gap varying from 1-2 inches at the top.  The old fiberglass had been installed with no gaps.  Now there was at least an unacceptably large gap at the top of the farthest right row. Only the portion above the cross piece was visible on the next row, so I don't know if fiberglass had been repaired there.  When I later rolled up the fiberglass, it seemed they hard hardly used any.  They couldn't have replaced more than the first two stud bays of insulation, and possibly only one.

I don' know how much fiberglass was replaced, but seeing how they left gaps where they did replace it, perhaps it's fine that they didn't replace much.  That's what I thought when I saw the gap.  By that time the backing board had almost been completely installed, with only the last few inches visible above.  (BTW, the backing installation looked as superb as I could imagine, though I am no inspector.)  It was too late to change any insulation covered up, and it would be a big hassle even to fill the gap up top.  I felt better to leave the guys alone to doing a very nice tile installation.  I could hardly ask for perfection on this re-insulation as it was an "extra" and these guys were tile specialists, not insulation specialists.  Though it does bug me that nowadays all builders should be insulation specialists, and hole fillers, given the increasing importance of energy efficiency.

I think an optimal remodel would have replaced all the old fiberglass, and done so at code level or better.  And of course all holes filled.

As far as holes generally not getting filled…I could write a book on that by now.  Even with the best builder I now know, Tom, working himself, when I ask for it, I can get serious crack filling done.  But if it's too weird, such as grade level behind the baseboard, he won't take much time on it, and I may well (I did in the King's room) reseal it again myself.  With Rob, it seemed impossible to get him to even seal behind the baseboards.  Sealing behind the baseboards is contrary to the first rule of contract building: quickly cover it up.  And the second rule is: what's covered up and can't be seen doesn't matter.

Now I did that evening observe some gap between the otherwise perfect backing board and the ceiling.


I asked for that gap to be filled with mud, as contractor Tom had done in the King's Room.  The tile guys easily obliged, and the result was almost but not quite sealing perfection.  I decided not to rag them further..perhaps that small hole in the back left corner would be useful for tile or grout installation or whatever, and would cause a problem if they tried to fill it completely.  Probably not, but I don't like to be too pushy, so my artists can concentrate on their craft as they know it, and not get distracted by me when it's only super trivial.  The rest of the sealing is wonderful--and I bet it's not usually done, but I got it because I asked for it.


Still, things like sealing fan boxes to the sheetrock, I just know I have to do myself, and have done so, for three new fans since 2012, and many outlet boxes also.

I've now tested the inside of the tiled area with an IR thermometer.  Surprisingly there is little particular variation over where I saw the slight gap on top.  In general, the first stud bay area is about a degree or so warmer than might be expected in the middle, then only average at the very top.  So perhaps the new fiberglass in that area helped, but the gap in fiberglass didn't.  Best would have been new fiberglass everywhere.

The tile exterior wall is nonetheless colder than it should be everywhere, in the range of 59-65 when the interior wall is at 71 degrees (and it's freezing outside).

I think the problem now mainly is most likely exterior gaps.  Cold air is getting into the stub bays.  If cold air leaks in, the insulation doesn't help much anyway.  I need to study the outside with IR, which I rarely remember to do, or don't feel like doing.  Or even get professional examination. I've seen $99 IR cameras for smartphones too, and that looks interesting.

Anyway, there are bigger holes.  Such as the fireplace, it seems, is one of the coldest places inside the house, I've determined.  The flu has been snugly shut since forever, but the metal piece itself most likely is uninsulated and draws cold into the house.  I need at least a fireplace door, or maybe seal the whole thing up.  But I'l also worried about the acoustics.  Anyway that's a big unsolved hole.  As is the garage conversion suspended ceiling, but that ideally requires a complete rebuild with walls extended to the true garage ceiling--then get that insulated.  Strangely the hall bath is another cold place, and yet it's an all interior room with no exterior walls.  It does seem that a cold spot is the ceiling exhaust fan, but also the side wall which faces the plumbing void.

But the mainstream of builders seems to be well away from accepting what I might call the theory of no holes.  No holes is better than some, and the fewer the better.  Holes at any layer are bad, even when easy to cover up.  Each layer of construction should be continuous from end to end.  It doesn't take very much thought to understand this.  Any hole is a thermal bridge and possibly also a leak.